With Easter around the corner, I thought it would be fitting to dust off my hot cross bun recipe and do a little remake. Spolier alert, they are still amazing, and I feel like they almost get better each time I make them. Originally for this week I was going to try another hot cross bun recipe to see if it made a difference, but then I remembered how delicious these ones were and I couldn’t bring myself to make anything else! When you’ve got an oldy-but-a-goodie recipe, why mess with a good thing?
I am so excited for Easter this year. It probably isn’t so much about the food (actually I lie, it totally is) but I am just looking forward to having 4 days off! It will be nice too as we will be away for Easter and so I feel like I might actually be able to relax rather than finding a million things to do around our apartment! I am the worst when it comes to relaxing, often I feel guilty I’m not doing anything, and so the only time I’ll truly stop is if I’m away from all those day to day tasks and to dos. Nothing beats lying on a beach and enjoying the sunshine when you need a few days off to recoup!
But anyway, back to the other reason that I love Easter: the food. I absolutely love Easter Eggs, they are seriously my guilty pleasure, and basically the only time I seek out milk chocolate, being a dark chocolate fan myself! I have a habit of overbuying Easter Eggs when I duck in for grocery shopping because I can’t say no! But definitely the best part of Easter is the hot cross buns! I seriously don’t know why they aren’t served all year round because they are so delicious, but I guess if they were available all the time I would be the size of a house, so it is probably for the best! Nothing beats a hot cross bun toasted in the oven and oozing with melted butter. I just don’t think anything at Easter can top that, even the Easter Eggs!
So when I learnt how to make hot cross buns and realised that it really isn’t that difficult, my whole world changed. I guess technically I could make them for myself anytime now, but I have refrained! They are far more special when you just enjoy them at Easter. What I love about making them is that despite how relatively easy they are to make, they seem to be a great thing to cook when you are wanting to impress your friends and family! I’ve had a lot of friends and family members reach out saying they can’t believe I made them, and also asking if they can have one or two. I think my partner is a little worried about the dwindling supply…I might need to make another batch!
- 1 packet of dry yeast
- ½ cup caster sugar
- 1 1/2 cups of lukewarm milk
- 4 1/4 cups of plain flour
- 2 tsps mixed spice
- 2 tsps ground cinnamon
- 50 grams unsalted butter, melted
- 1 egg
- 1 1/2 cups of sultanas
- 200 grams cooking chocolate, broken into small chunks
- ½ cup plain flour
- 1/3 cup water
- ½ cup caster sugar
- ½ cup water
-
In the bowl of a stand mixer, place the yeast, caster sugar and the milk, stir to combine, and set aside for 5 minutes. The mixture will start to foam when the yeast is active.
-
Once the yeast mixture is ready, add the plain flour, mixed spice, cinnamon, butter and egg to the yeast mixture. Use the dough hook of the stand mixer to knead the dough for 5 minutes on medium.
-
Turn the stand mixer off and add the sultanas and chocolate chunks. Beat on medium for another 3-5 minutes or until the dough is elastic.
-
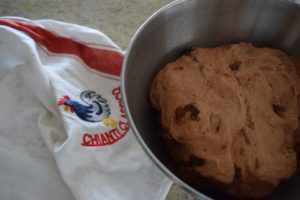
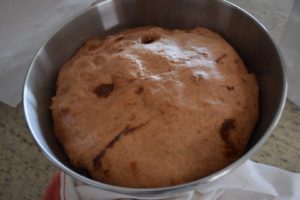
Lightly oil a medium sized mixing bowl and place the dough in the bowl. Cover with a clean, damp cloth and set aside for 1 hour in a warm place. The dough should double in size.
-
Once the dough has risen, line a square baking tin with baking paper. Separate the dough into 12 even balls, rolling using your hands and placing side by side in the tin. You don’t need much room between them as they will easily pull apart after cooking. Cover with the damp cloth and let rest in a warm place for another 30 minutes.
-
Meanwhile, preheat the oven to 200C (400F). To make the crosses, mix the plain flour and water in a small bowl until combined. Either use a piping bag if you want neat crosses, but if not, you can decorate using a knife as long as your mixture is nice and thick.
-
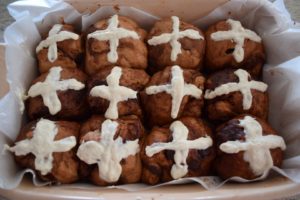
Once the buns have had time to rise a little more, either pipe or use a knife to pull the cross mixture across the buns to form crosses on to the top of the hot cross buns. I found using a knife wasn't too hard but you just had to load it up with the cross mixture first.
-
Once you have piped all the hot cross buns, place them in the oven. Bake for 25-30 minutes or until golden and springy to touch.
-
Right before the hot cross buns are ready, place the sugar and water in a small saucepan over a medium heat. Stir until the sugar has dissolved and and the mixture is simmering.
-
Take the hot cross buns out of the oven. Using a pastry brush, cover the top of each bun with the sugar glaze immediately.
-
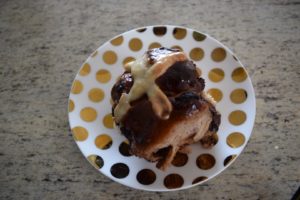
Serve right out of the oven with a generous serve of butter, or for days after by reheating for a couple of minutes in the oven.
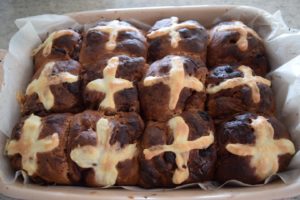
Although this might seem like a bit of a complicated recipe, it is actually really simple. I think the hardest part for me was the crosses but that was due to my pure laziness in not using a piping bag. Although in my defense, although it was a little fiddly, it really wasn’t too difficult doing the crosses by hand using a knife. It just took a lot longer than it would to pipe it, so I guess it is up to you what you choose. I decided that these were nice and rustic looking, or so I keep telling myself!
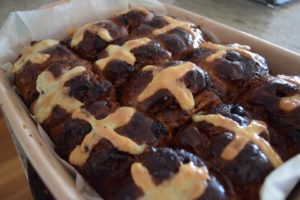
Because it was a warm day and I used room temperature cooking chocolate, the chocolate ended up melting into the dough a little and made these hot cross buns chocolate flavoured. I was a little worried it might mess with the dough at first but it ended up making them even more delicious! If you want proper chocolate chips though, I would use refrigerated chocolate to avoid melting. If you want to be traditional you could also easily leave these out and up the amount of sultanas you’re putting in. I highly recommend the chocolate though, it just makes them that much more decadent!
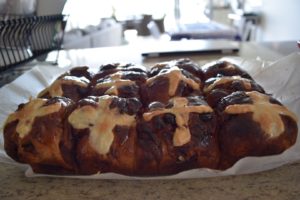
These hot cross buns turned out even better than the last ones I made, and it was so satisfying biting into a freshly baked bun smothered in butter. Although it took longer than going down to the store to buy a pack, nothing beats making them yourself, especially as the process overall is quite fun! It’s a great way to get into the Easter spirit!
Until next time, happy eating!
Ella xx

